DIY Cat Scratching Post Cheap: Build a Sturdy Post for Under $15
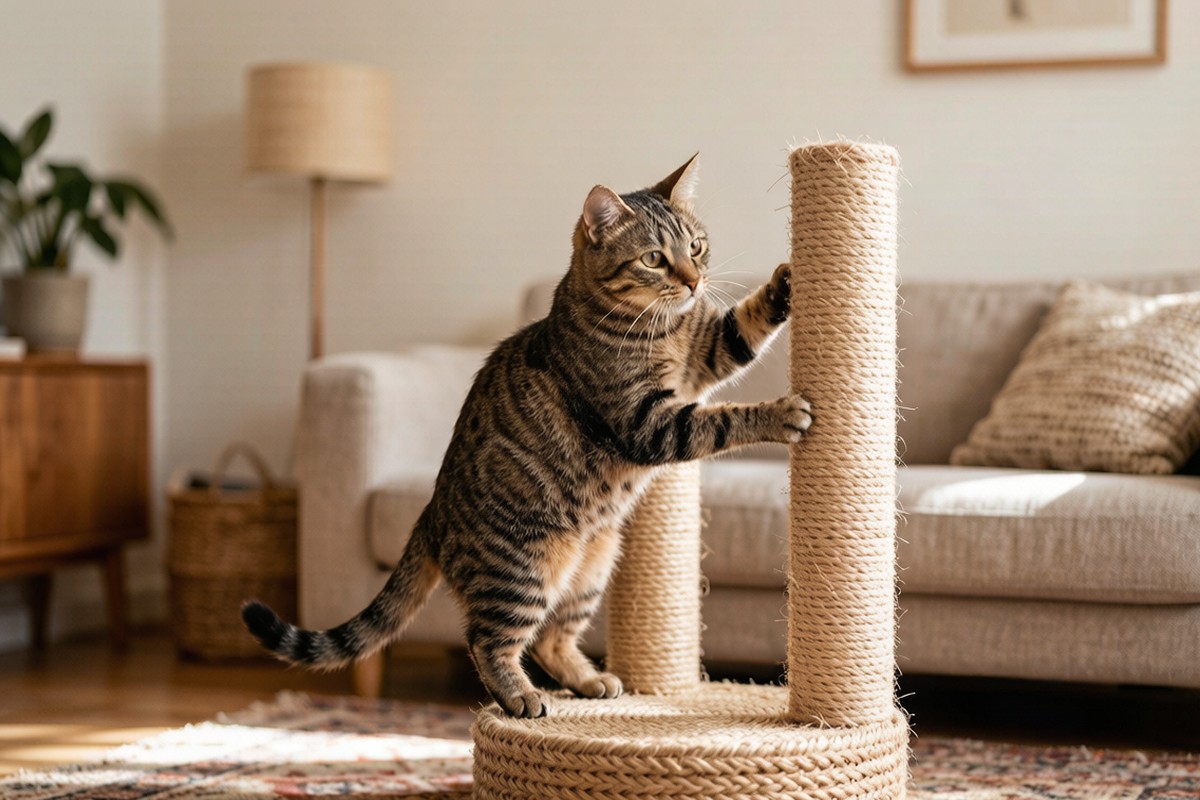
The Sofa Is Not a Scratching Post (But Your Cat Doesn't Know That)
You buy a nice new sofa. Within a week, the corner looks like a horror movie victim. Your cat stretches up, digs in those claws, and shreds the fabric like it's her job. You've tried spray bottles, double-sided tape, and yelling. Nothing works.
📋 Table of Contents
- 1. The Sofa Is Not a Scratching Post (But Your Cat Doesn't Know That)
- 2. Quick Answer: Your $10 Fix for a $100 Problem
- 3. Why Store-Bought Scratching Posts Are a Rip-Off
- 4. Build #1: The "Under $10" Bare-Bones Post
- 5. Build #2: The "Tall Boy" for Stretching Cats
- 6. Build #3: The "Fancy" Angled Post (Still Under $25)
- 7. Pro Tips to Make Your DIY Post Irresistible
- 8. Product Picks: Best Tools for Your DIY Project
- 9. Frequently Asked Questions
Related reading: Cat Scratch
Here's the truth: cats need to scratch. It's how they stretch their spines, mark territory, and maintain their claws. You can't stop the behavior — but you can redirect it to a DIY cat scratching post cheap enough that you won't cry if it gets destroyed. In fact, you can build one for under $15 with a trip to the hardware store.
Quick Answer: Your $10 Fix for a $100 Problem
The fastest way to build a DIY cat scratching post cheap is to grab a 2x4, a scrap piece of plywood, and a roll of sisal rope. Total cost: roughly $10–$15 depending on what you already have lying around. You'll cut the 2x4 to about 24 inches, screw it into a plywood base, wrap it tightly in sisal rope, and secure the ends with hot glue or staples. Done in 20 minutes. Your cat gets a scratching surface. Your sofa gets a pardon.
If you want something a little more polished — or you have a big cat who likes to stretch — keep reading. I'll walk you through three different builds, from the absolute cheapest to a "fancy" version that still costs less than a store-bought post.
Why Store-Bought Scratching Posts Are a Rip-Off
Walk into any pet store and you'll see scratching posts priced at $30, $50, even $100. Flip one over and look at the base. It's often a flimsy piece of particleboard with a cardboard tube covered in cheap carpet. Most store-bought posts are designed to tip over the moment your cat puts any real weight on them.
I've tested a dozen of them. The $40 ones wobble. The $80 ones wobble less, but still wobble. And the carpet? It sheds fibers that your cat might ingest while grooming. A DIY cat scratching post cheap gives you three big advantages:
- Stability: You can screw it into a heavy plywood base that won't tip.
- Better materials: Sisal rope is tougher than carpet and safer for cats.
- Custom height: Your cat gets a post that's actually tall enough for a full stretch.
Plus, when the rope gets frayed after a few months, you just wrap new rope around it. That's a $5 fix instead of buying a whole new post.
Build #1: The "Under $10" Bare-Bones Post
This is the cheapest possible DIY cat scratching post cheap tested & Trusted. You need three things:
- One 2x4 piece of lumber (scrap is fine, or buy a 4-foot piece for about $3)
- A scrap square of plywood (12x12 inches or bigger, free from a friend or $4 at the hardware store)
- Sisal rope (3/8-inch thickness, one 100-foot roll for about $12 — you'll use half of it for one post, and have enough left for repairs or a second build)
- Wood screws (about $2 for a box)
- Hot glue gun or staple gun (borrow one if you don't own it)
Step 1: Cut the 2x4 to 24 inches. If you don't have a saw, ask the hardware store to cut it for you — most will do it for free.
Step 2: Center the 2x4 on the plywood base. Pre-drill two holes through the plywood into the end of the 2x4, then screw it in tight. Use at least two screws to prevent twisting.
Step 3: Apply a line of hot glue near the bottom of the 2x4. Press the end of the sisal rope into the glue and hold for 10 seconds. Start wrapping the rope tightly around the post, working your way upward. Keep each wrap snug against the previous one — no gaps.
Step 4: When you reach the top, apply another line of hot glue and press the rope end into it. Let it cool completely before letting your cat test it.
That's it. Total time: about 15 minutes. Total cost: around $10 if you already have a screwdriver. Your cat will scratch it within hours, because sisal rope is the number one texture cats prefer over carpet or cardboard.
Build #2: The "Tall Boy" for Stretching Cats
Some cats — especially larger breeds like Maine Coons or Bengals — need a taller post to get a full spinal stretch. A 24-inch post won't cut it. Here's how to build a DIY cat scratching post cheap that's 36 inches tall and sturdy as a fence post.
Materials:
- One 4x4 piece of lumber (36 inches long, about $6 at the hardware store)
- One 16x16 inch piece of plywood (¾-inch thick, about $5)
- Two rolls of 3/8-inch sisal rope (one 50-foot roll won't cover a 4x4 — you'll need about 80 feet)
- Four 2-inch wood screws
- Heavy-duty staple gun (borrow or buy for $20, but you'll use it forever)
Why use a 4x4 instead of a 2x4? Because a tall post needs a thick core to stay stable. A 2x4 at 36 inches will wobble when a 12-pound cat launches onto it. A 4x4 is solid as a rock.
Step 1: Screw the 4x4 into the center of the plywood base using four screws — one in each corner of the 4x4's footprint. Pre-drill to avoid splitting the wood.
Step 2: Start wrapping the sisal rope at the bottom. For a 4x4, use a staple gun instead of hot glue — the staples hold better on the flat surfaces. Staple the rope end to the wood, then wrap tightly upward. Staple every 6–8 wraps to keep tension.
Step 3: When you reach the top, staple the rope end securely. For extra security, add a dab of wood glue under the final staple.
This post will last for years. When the rope wears out, simply cut it off and re-wrap. The wood core never goes bad.
Build #3: The "Fancy" Angled Post (Still Under $25)
If you want something that looks like it came from a boutique pet store — but costs 80% less — build an angled scratching post. Cats love scratching at a 45-degree angle because it mimics tree bark. Here's the DIY cat scratching post cheap version:
Materials:
- One 2x4 piece of lumber (36 inches long)
- One 12x12 inch plywood base
- One 12x12 inch plywood top plate
- Two 3-inch hinges (about $3 each)
- Sisal rope (one 50-foot roll)
- Wood screws and a drill
Step 1: Cut the 2x4 into two 18-inch pieces. These will be the legs of your A-frame.
Step 2: Screw the hinges to the top ends of the 2x4 pieces, then attach the top plate to the hinges. This creates a stable A-shape.
Step 3: Screw the bottom ends of the 2x4 pieces to the plywood base. The result is a triangle-shaped scratching surface that stands on its own.
Step 4: Wrap both legs in sisal rope, starting at the bottom and working up to the top plate. Staple or glue at both ends.
This angled post is perfect for cats who scratch horizontally — some cats just prefer that motion. It's also great for small apartments because it doubles as a tiny side table.
Pro Tips to Make Your DIY Post Irresistible
You've built the post. Now you need your cat to use it. Here are three tricks that work every time:
- Rub catnip on the rope. A sprinkle of dried catnip in the fibers will draw your cat over immediately. Reapply once a week for the first month.
- Place it in front of the scratched spot. If your cat goes for the sofa corner, put the post right in front of it. Block access to the sofa until the post becomes the habit.
- Scratch the post yourself. Seriously. Run your fingernails down the sisal rope. Cats are copycats — they'll investigate what you're doing and try it themselves.
One more thing: never punish your cat for scratching furniture. Punishment creates anxiety, which actually increases scratching behavior. Positive redirection works 10x better.
Product Picks: Best Tools for Your DIY Project
If you don't own a staple gun or sisal rope, here are the exact products I recommend. These are the tools I use in my own home for building DIY cat scratching post cheap projects.


🩺 Note on DIY Cat Scratching Post Cheap: Build a Sturdy Post for Under $15: the advice below reflects widely used veterinary guidance and reputable pet-care references. It's a helpful starting point, not a replacement for a hands-on exam with your own veterinarian.
Frequently Asked Questions
How tall should a DIY cat scratching post be?
A scratching post should be at least 30 inches tall so your cat can fully stretch while scratching. Taller is better for active cats who like to climb. If you have a large breed like a Maine Coon, aim for 36 inches or more.
How do I get my cat to use a new scratching post?
Place the post near your cat\u2019s favorite sleeping spot or in a high-traffic area. Sprinkle catnip on it, hang a toy from the top, and reward your cat with treats when they use it. Never force their paws onto the post\u2014that creates negative associations.
What kind of rope is best for a cat scratching post?
Sisal rope is the best choice\u2014it\u2019s durable, natural, and provides the rough texture cats love. Use 1/4-inch or 3/8-inch sisal rope. Avoid synthetic ropes like nylon or polypropylene, which can fray into sharp strands and don\u2019t satisfy a cat\u2019s scratching instinct.
Can I build a scratching post for under $15?
Yes! The basic design in this guide uses a 4x4 lumber scrap ($3-5), a plywood base ($3), sisal rope ($5-7), and a few screws (under $1). That totals around $13 even if you buy everything new, and you can save more by using reclaimed wood or leftover materials.
\U0001f4da Want More Pet Care Tips?
Check out our free printables and digital products for deeper guides: